QuickBooks Tip 6 - Pay a Bill by Check
Welcome back to our QuickBooks Tip of the Week. Today, we are looking at how to pay a bill by check in QBO. Although you may already use a bill pay company to handle your payments, they may be times you utilize the bill pay feature in QBO itself. To create a check payment, you will start by click, “New” in the top left corner in QBO. In the drop-down menu, select “Check.”
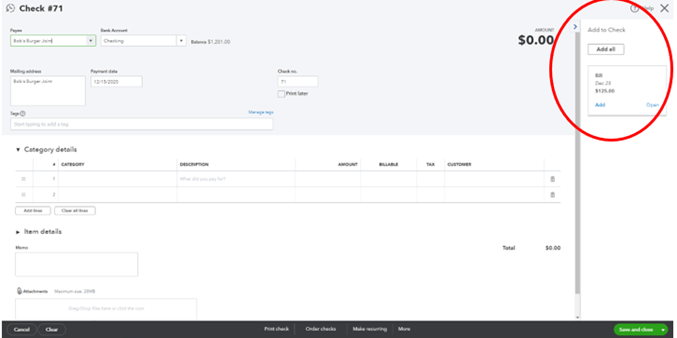
This will open the check screen. As you can see below, they are several important fields you must fill in. First, enter a payee. This should automatically prompt a sidebar with a list of open bills from that vendor to appear on the right-hand side. (If you are not sure how to do this, check out last week’s tip) If it does not, click the small blue arrow in the top right, (highlighted below) to open this tab. If you select a bill, it will automatically populate that information into the category details. You can also select multiple bills to pay on the same check.
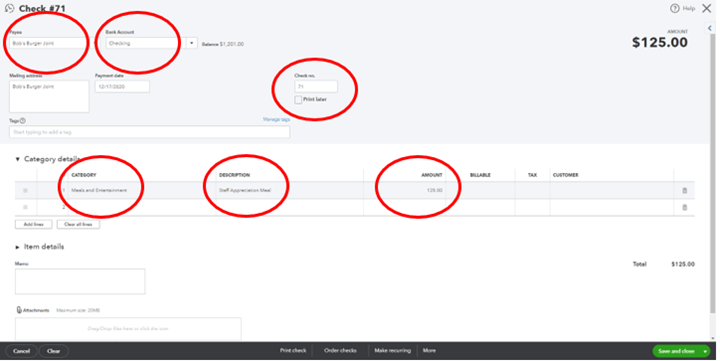
If you do not have an existing bill in the system for that vendor, you can enter the information yourself. After selecting your payee, make sure you choose the account that the funds will be deducted. Make sure the date and check number are correct. Then you can fill in the category details. All of these are circled below.
Two things to note. Make a habit of putting a description for all checks. This not only helps keep you organized, but your accountant will also thank you! Additionally, QBO also lets you print a copy of your check if you keep paper records. You will see that on the toolbar at the bottom of the check screen.
With these skills, you are now ready to pay for your first bill in QBO.
Want more tips on using QBO for your small business? Subscribe to our mailing list or follow us on Facebook, Instagram and Twitter!